Overview
This section explains the basic settings on the admin panel required for smooth artwork registration and publication after activating R_aisonné. While much of the system is automatically configured, a minimum review is required to match your operational rules. From the “R_aisonné Settings” menu in the admin panel, check and configure the following basic items.
Permalink Settings
This is a mandatory setting for the plugin to function correctly. Change the permalinks to “Custom Structure” and specify:
/%category%/%postname%/
If this setting is not applied, routing to each page will not occur, and the overall functionality of the plugin will not operate.
R_aisonné Items
- Storage Path Settings
- Database Settings
- Classification Settings
- Material Settings
- Support Settings
- Genre/Subject Settings
- Current Status Settings
- Artist Settings
- Advanced Settings
1. Storage Path Settings
If you change the storage path, the link to the image data stored in the previous path will be broken, and images will no longer be displayed on the site. When changing the path, actions such as manually moving the data are required.
Storage Path Settings for Image Data
- Automatic Generation: The image storage folder r_ais_data/ is automatically generated upon plugin activation.
- Initial Location: In principle, it is generated one level above the WordPress installation directory (outside the public domain).
- Automatic Fallback: In environments where writing to the upper directory is restricted by server limitations, r_ais_data/ is automatically generated within
wp-content/uploads/to prioritize operational stability.
/home/user/
├── r_ais_data/ (Recommended: Protected Area)
└── public_html/ (WordPress Installation Directory)
         └── wp-content/uploads/
                  └── r_ais_data/ (Alternative Area: In case of write restrictions)
f operating on a subdomain or subdirectory, the initial data storage path may default to a location inside the “Web Public Directory” (e.g., public_html). To ensure higher security, it is recommended to manually change the storage path to a location outside the public directory (e.g., /home/user/) via the “Storage Path Settings” in the admin panel.
Operational Safety and Efficiency
Physically isolating the data folder from the public domain significantly improves security. Furthermore, during site migration or backups, managing the WordPress core and image data separately maximizes operational safety and efficiency.
Note: If the “Alternative Area (uploads)” is selected due to server restrictions, you may continue operations as is.
[IMPORTANT]
While it is possible to reconfigure the path to the “Protected Area” after changing your server environment in the future, previously registered images will not be displayed unless you manually move the data from the old folder to the new path. Please exercise caution when changing the storage path after the system is already in operation.
2. Database Settings
In this section, you define the display formats for artworks on the front end as well as the visible columns in the database management screen. By adjusting each item, you can build an environment optimized for your site’s design and operational rules.
Registration Form Settings
1. Hidden Fields in Registration Form
You can individually hide input fields that are not required for your operations.
Check the boxes for the items you wish to hide (e.g., Artist, Edition, Signature, Provenance, Exhibition History, Bibliography). Hidden items can be restored at any time by unchecking them.
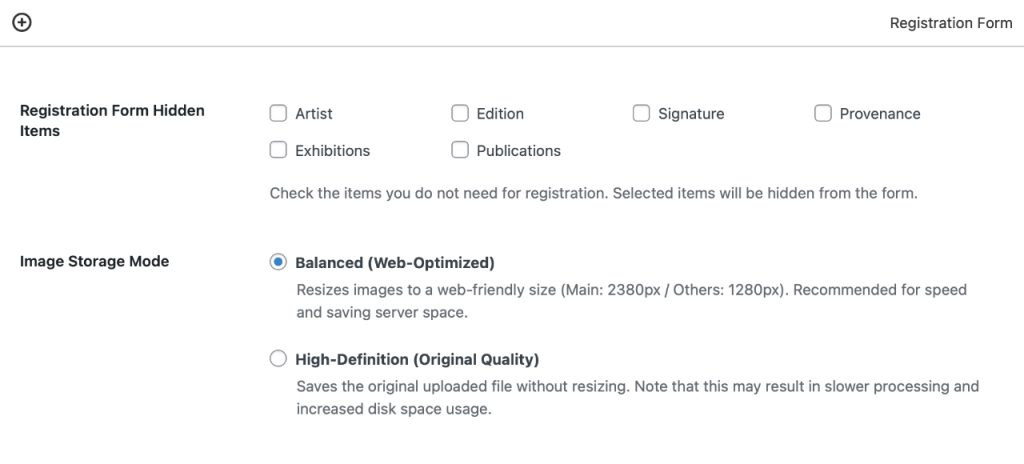
2. Image Storage Mode
Select the method for processing uploaded images.
Standard (Optimized for Web)
Automatically resizes the main image to a maximum of 2,380px on the long side and sub-images to a maximum of 1,280px on the long side.
This maintains high-definition display while significantly reducing file sizes.
It helps save server capacity and ensures fast site loading speeds.
High-Definition (Maintain Original)
If you wish to preserve images at print-level quality, they will be saved while maintaining the original resolution and image quality of the uploaded files.
Because large files are handled without compression, processing may take more time.
As this mode consumes significant server capacity, please be mindful of your available storage space.
Artwork List Settings (Common to Login/Logout)
Configure the common settings for the artwork database list display.
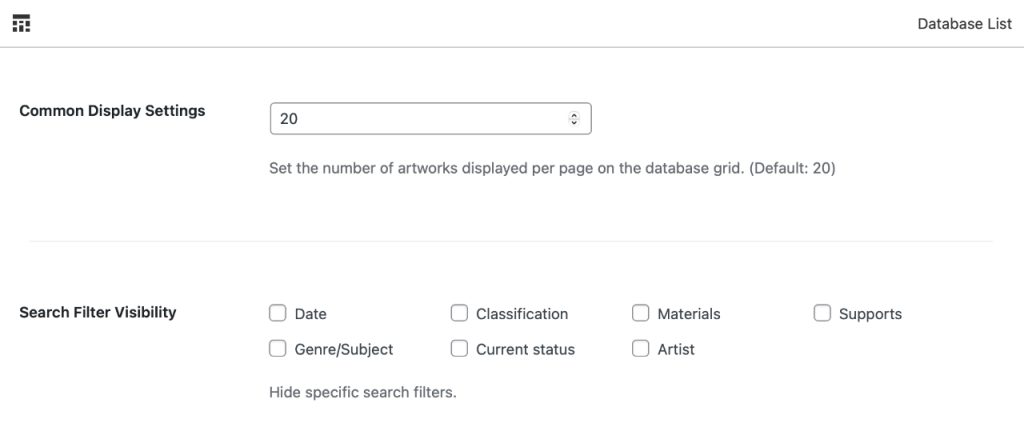
1. Items per Page
Set the number by entering a value directly into the input field. (Default: 20)
2. Search Filter Display Settings
Check the boxes for items you wish to hide from the search menu. The selected items will be excluded from the search filters.
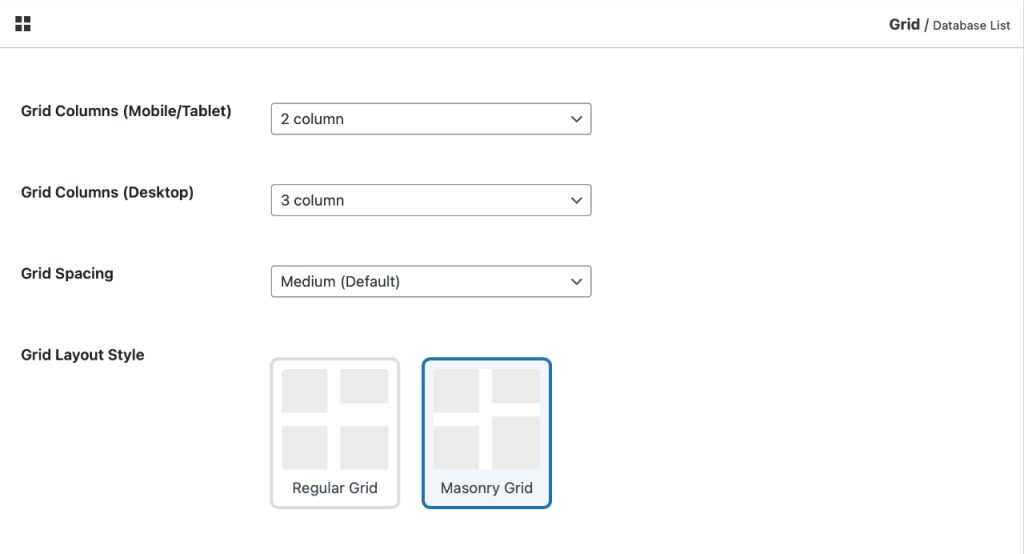
Grid Layout Adjustments
Configure the detailed arrangement of images for the artwork list on the public site. You can optimize the layout to ensure the best viewing experience across various devices.
Column List Display Settings
Customize the information displayed when the artwork database is viewed in a “List (Table)” format. You can differentiate what information is shown based on the viewer’s access level (e.g., public-facing lists versus private administrative lists).
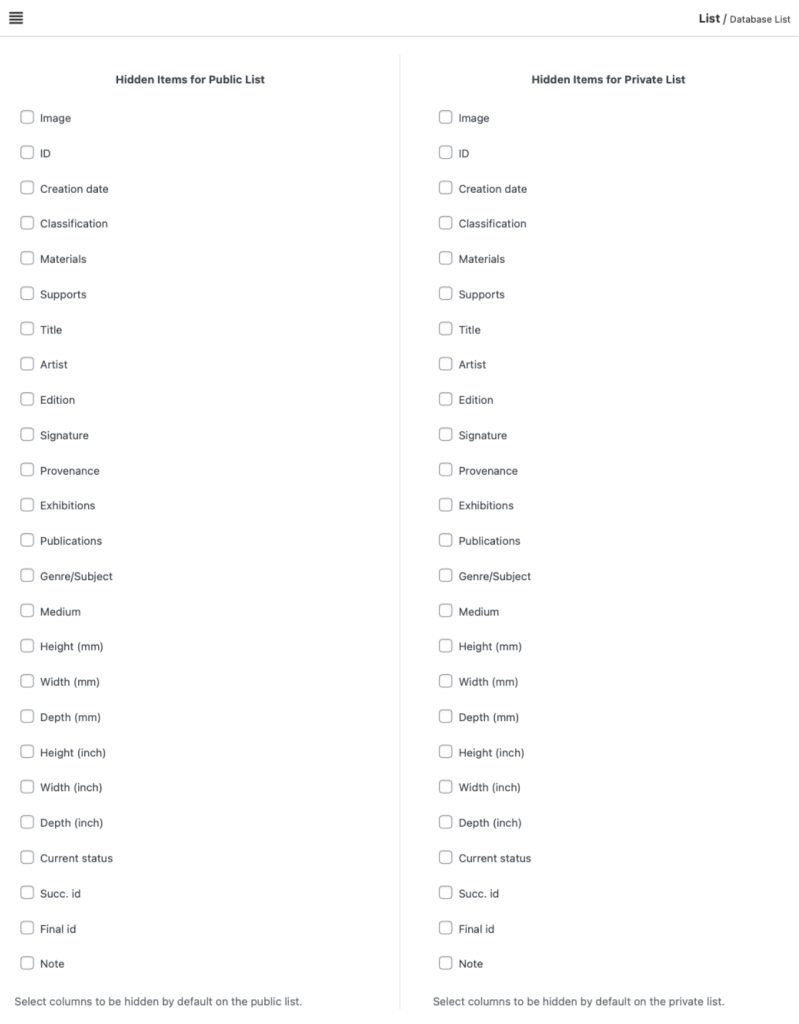
1. Hidden Items in Public List
Set the items to be displayed in the “Public List” accessible by general viewers.
- How to Configure: Check the boxes for the items you wish to hide from the list.
- Use Case: By hiding information unnecessary for public viewing—such as ID, Current Status, or detailed dimensions (e.g., inch notation)—you can create a simple list with high visibility.
2. Hidden Items in Private List
Configure the items displayed in the “Private List” accessible only to administrators.
- How to Configure: Similar to the Public List, check the boxes for items you do not wish to display.
- Use Case: You can improve the usability of the management interface by choosing to display items specific to administrative tasks (such as Succession ID or Final Form ID) or by removing items that are unnecessary for your current workflow.
Artwork Detail Page Settings
Adjust the rules for text display and the quality of images on individual artwork detail pages. When a visitor saves an image via right-click, it will be saved at the quality (compression rate) specified here.
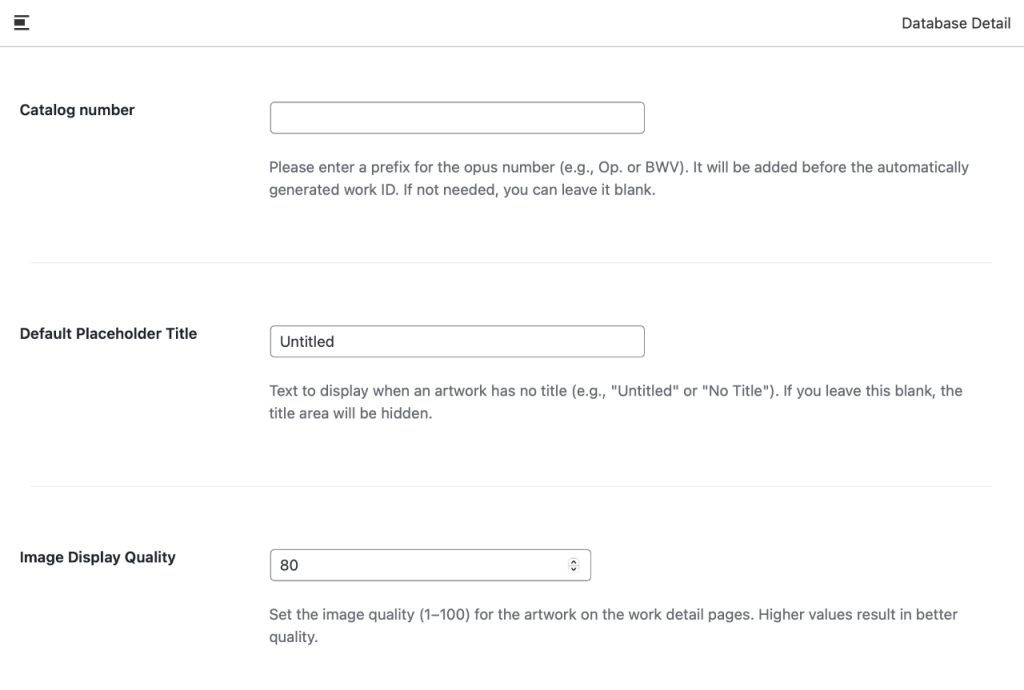
1. Work Number (Prefix)
Specify a string to be added before the automatically generated Work ID (e.g., Op. or BWV). This can be left blank if not required.
2. Placeholder Text for Empty Titles
This text is displayed when a work’s title is left blank. By setting a placeholder like “Untitled”, you can prevent layout issues on list and detail pages for works without a finalized title. If left empty, the title display will be skipped entirely.
3. Display Quality
Display Quality (1–100): Set the numerical quality of images displayed on the artwork detail pages. By setting a lower value, you can reduce the practical quality of images saved via right-click, serving as a simple protective measure against unauthorized use or reproduction of your content.
3. Classification Settings
Items created in the “Classification” settings are used to categorize artworks and are reflected in features such as the filtering function on the front-end artwork list.
Please review the automatically inserted data and adjust it to match your specific style. While the underlying data is stored in English, the interface supports Japanese for selection, input, and display.
Search Menu on Public Site

Editing Classification Master Data
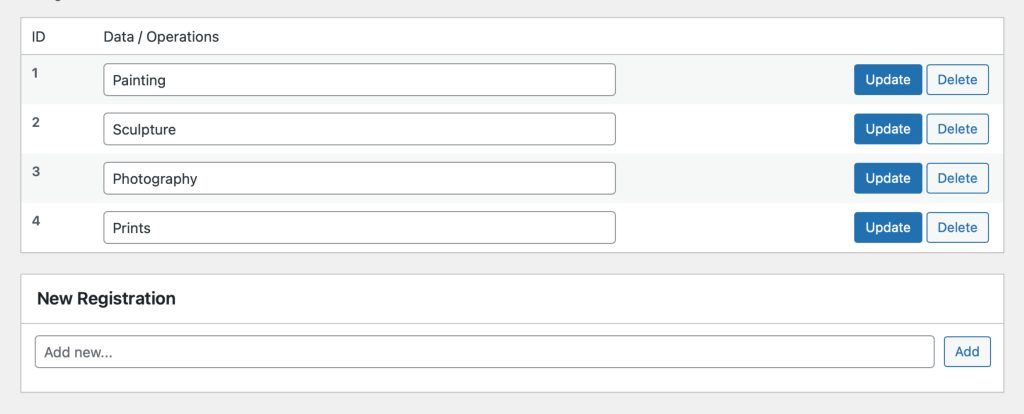
Each master data **ID** is linked to the `category_id` of both **"Materials"** and **"Supports."** If this relationship is broken, it may cause malfunctions in new registrations or search functionality. Therefore, please exercise caution when editing or deleting data from the management console.

When adding new entries, ensure that "Material" and "Support" items are properly linked to maintain **ID consistency**.
4. Material Settings
Items created in the “Material” settings are used to categorize artworks and are reflected in features such as the filtering function on the front-end artwork list.
Please review the automatically inserted data and adjust it to match your specific style. While the underlying data is stored in English, the interface supports Japanese for selection, input, and display.
Material Menu on Public Site
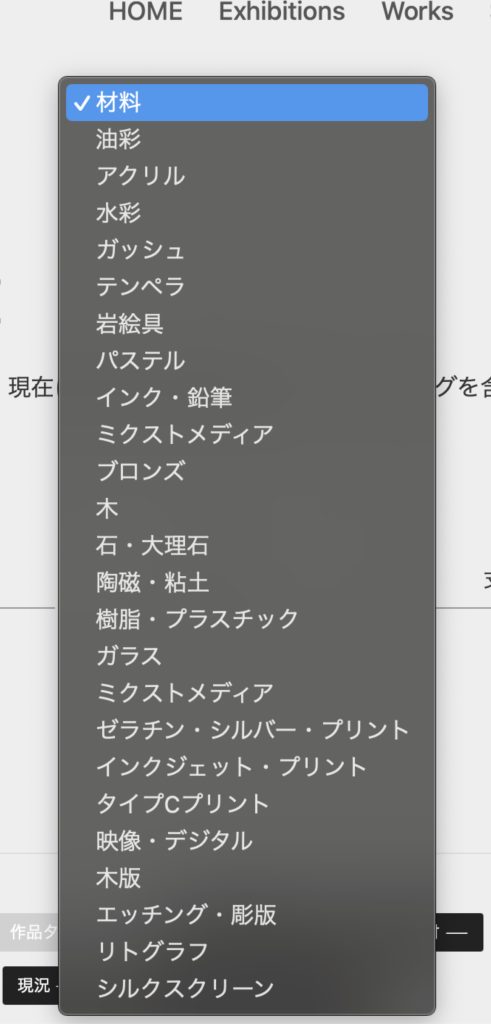
Editing Material Master Data
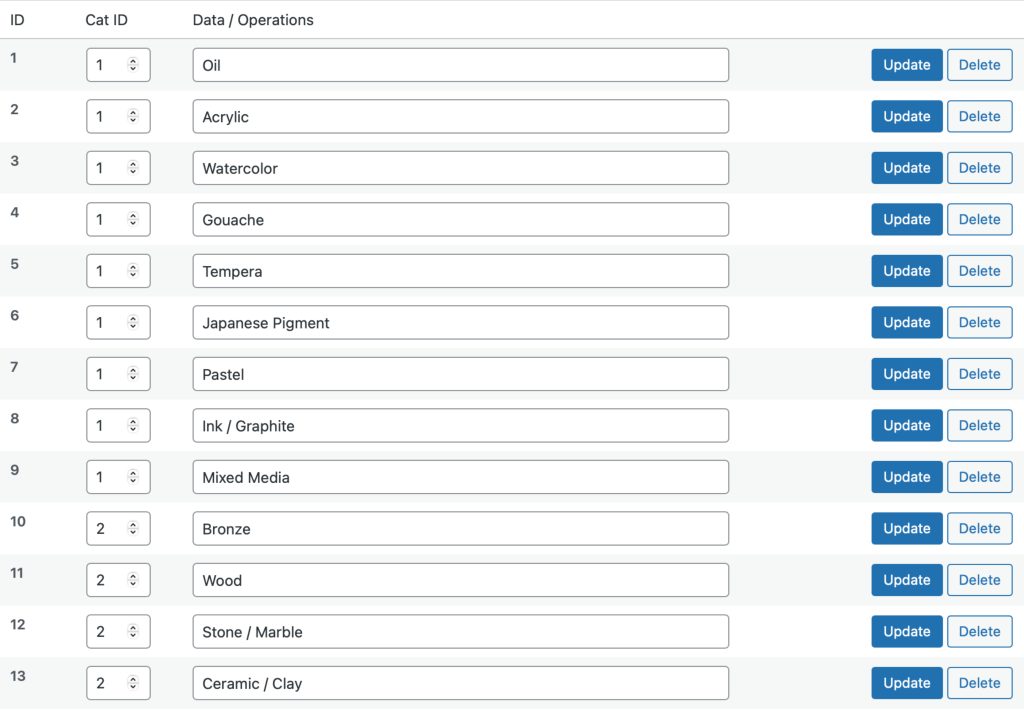
Each entry's **CatID** is linked to the **ID** in the "Classification" settings. If this relationship is compromised, new registrations and search functions may no longer operate correctly. Please exercise caution when editing or deleting data within the management console.
5. Support Settings
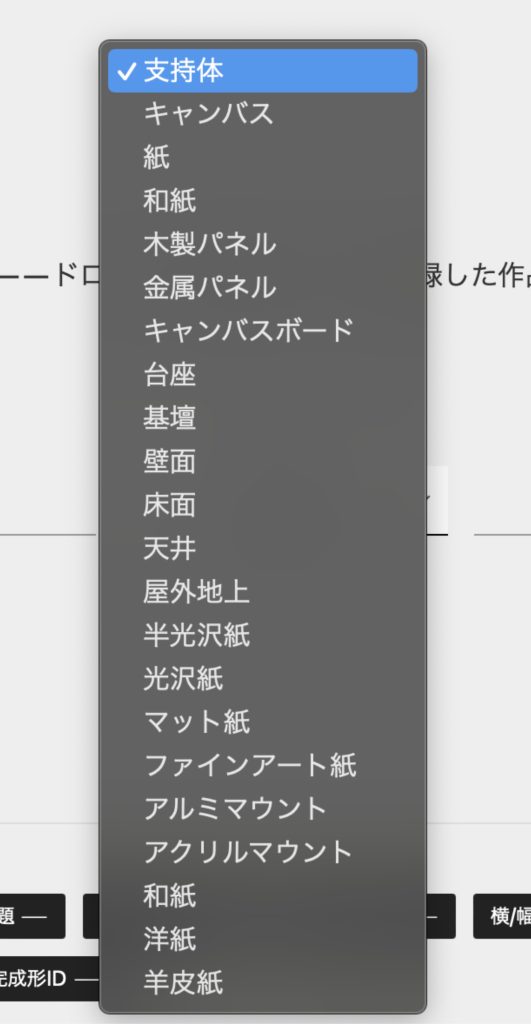
Items created in the “Support” settings are used to categorize artworks and are reflected in features such as the filtering function on the front-end artwork list.
Please review the automatically inserted data and adjust it to match your specific style. While the underlying data is stored in English, the interface supports Japanese for selection, input, and display.
Support Menu on Public Site
Editing Support Master Data
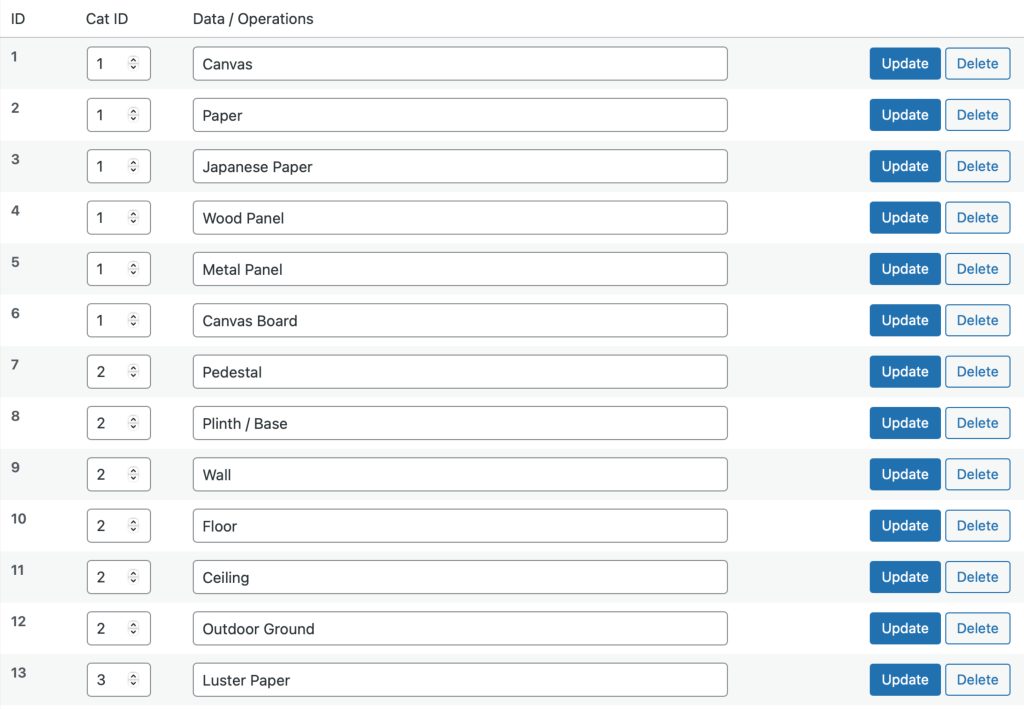
Each entry's **CatID** is linked to the **ID** in the "Classification" settings. If this relationship is compromised, new registrations and search functions may no longer operate correctly. Please exercise caution when editing or deleting data within the management console.
6. Genre/Subject Settings
This section allows you to define and create your own production genres or artwork themes (e.g., Landscape, Abstract, etc.). Since no default data is pre-inserted, you can freely add items according to your specific workflow.
The items configured here will become available as options in the select menu when registering new artworks.
7. Current Status Settings
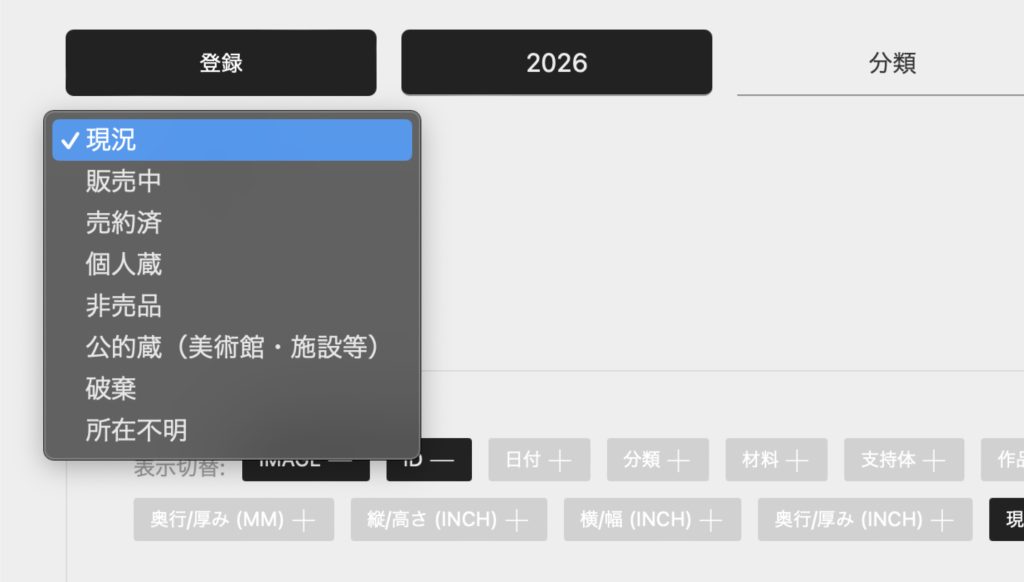
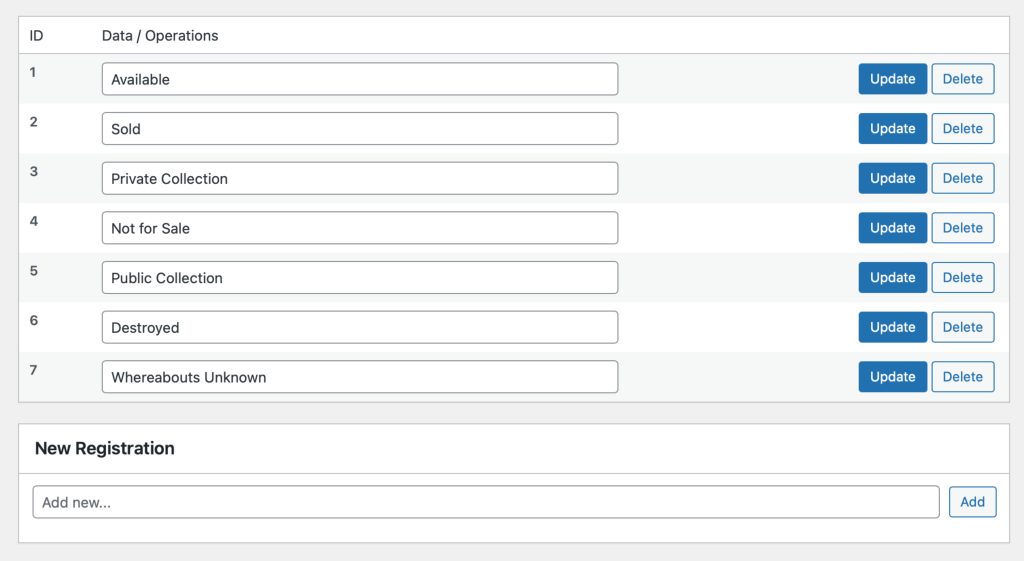
This section allows you to manage the current status of your artworks. While default data is pre-configured, you can update or delete items to suit your specific workflow.
Current Status Menu on Public Site
Editing Current Status Master Data
8.Artist Settings
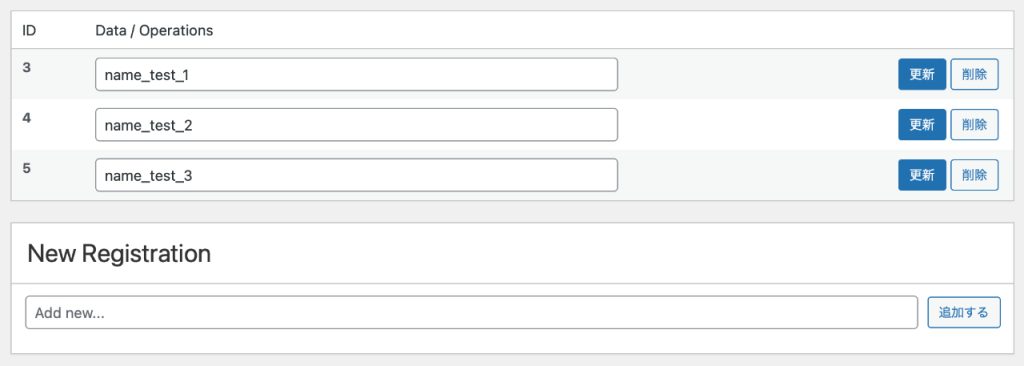
The system allows you to consolidate and manage artworks from multiple artists. By listing artist names in advance before registering artworks, the following functions will be enabled:
1. Seamless Linking During Registration
When registering an artwork, there is no need to enter the artist’s name manually from scratch. By simply selecting from the pre-configured list, you can accurately link artworks to artists. This completely eliminates inconsistencies caused by manual entry (e.g., whether or not there is a space between the first and last name).
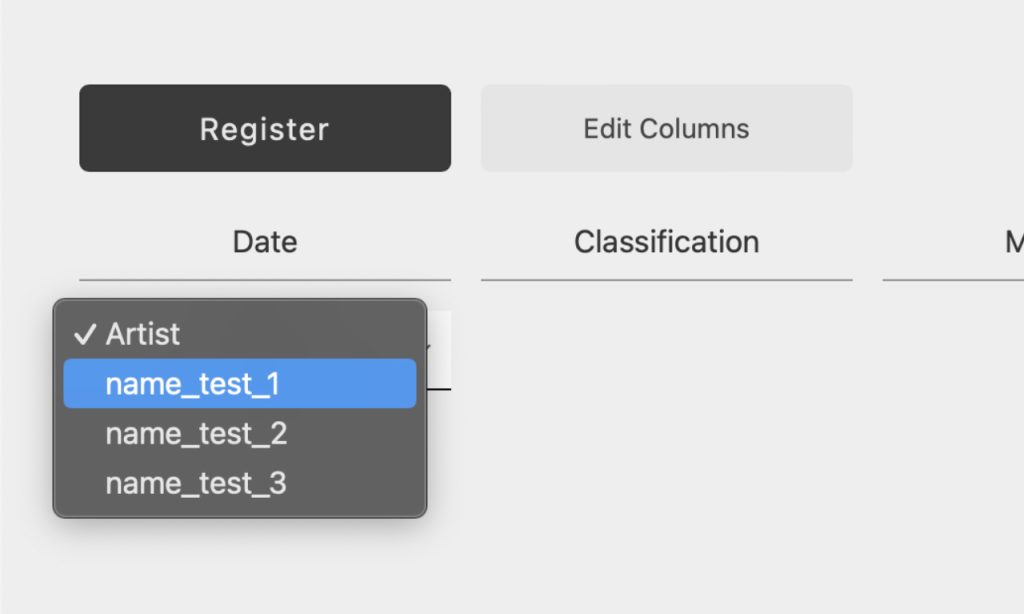
2. Automatic Integration into Search Filters
Artist names registered here are automatically reflected in the search filters on both the public site and the management console. Viewers can instantly filter and view works by a specific artist simply by selecting their name from the menu.
9. Advanced Settings
Front Page Settings
This feature is enabled when “A static page” is selected under [Settings] > [Reading] > [Your homepage displays] in the WordPress admin panel. On the website’s front page (static page), you can display the latest artwork images as the background and optimize the color of text and logos to complement those background images.
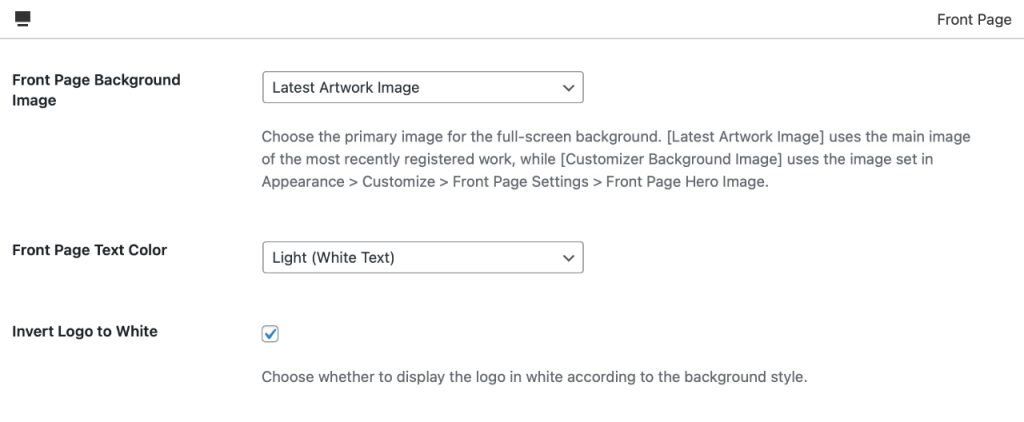
1. Front Page Background Image
Select the full-screen background image that serves as the “face” of your site.
- Latest Artwork: The most recent artwork registered in the database is automatically displayed as the background. This is ideal for highlighting your latest activity.
- Featured Image (Static Page Setting): Priority is given to the “Featured Image” set for the static page designated as the front page.
Note: If the specified image cannot be found, the system’s default image will be applied automatically.
2. Front Page Design Adjustments
You can control the visibility of the overlaying text and logos by adjusting them to match the type and brightness of the background image.
Global SEO Settings
Set the default image (OGP image) that appears when a page is shared on social media.
Role and Function: If a page without a set featured image is shared on SNS, the image specified here will be used as an automatic fallback. This helps maintain a consistent brand image and enhances the credibility of your site’s information.
SNS Link Display Settings
By configuring these URLs, icon links will be automatically generated on the contact page and in the footer.
The supported items are as follows:

- Threads
- YouTube
- X (Twitter)
Using Shortcodes
By entering the code in any location, you can display the icons. The size of the icons can be adjusted by changing the ratio value.
[r_ais_site_social_links ratio="1.5"]Google Analytics (GA4) Settings
This section is for managing your website’s traffic analysis. By entering your Measurement ID, the tracking tag will be automatically inserted into the header of every page, enabling site-wide analytics.